Installation instructions
LV2000
Low Voltage Power Supply Retrofit Kit for Wells-Gardner Color XY Monitor, model 19K6100
Installation Instructions
INTRODUCTION
This kit contains an assembled LV2000 printed circuit board. The LV2000 kit, when installed, will eliminate almost all the original components of the low voltage power section of the Wells-Gardner deflection board. The only components of the original low voltage circuit that will remain are the four rectifier diodes (D100-D103), the large filter capacitors (C100, C101), and the two chassis mounted power transistors. This kit will fix problems with your deflection board or monitor that are associated with the low voltage section. The circuit consists of the LM317 positive and LM337 negative voltage regulator, and necessary support components. The voltage regulators have built in current limit, thermal overload protection and safe area protection. This protection circuitry internal to the ICs are what make the LV2000 practically indestructible. Once the LV2000 is installed and functioning, you should never have to replace the low voltage power section of your Wells-Gardner deflection board again.
GETTING STARTED
To install the LV2000 kit you will need the following tools at your disposal:
- •AWells-Gardner deflection board.
- •A good soldering iron. One that has a good, clean, fine tip. The “pencil” type soldering irons are the only type you should use, do not use a “pistol” type soldering gun.
- • Some rosin flux solder. 60/40 or 63/37 solder will work.
- • Wire cutters. • Patience, attention to detail, and the willingness to do a good job!
- • Optionally, some de-soldering wick or a de-soldering pump.
When soldering the stand-offs and the wire to the deflection PCB, touch iron to the stand-off lead or wire and the deflection PCB pad, then let solder flow from the hot lead or wire on to the pad. Try not to keep hot iron on leads for more than 10 to 15 seconds. A hot, clean iron tip is important. Keep soldering iron tip clean by wiping it frequently on a wet sponge or wash cloth.
If you need further instruction on soldering techniques, there is a good soldering primer at
Installing the LV2000
The LV2000 is very easy to install with minimal soldering skills. Installing the LV2000 only fixes problems with the low voltage section, if there are other problems with your monitor, they will need to be fixed and that’s beyond the scope of these instructions.
Excellent documentation on the WG 6100
Remove the deflection board from your monitor.
The LV2000 is installed in the lower left corner of your deflection board.
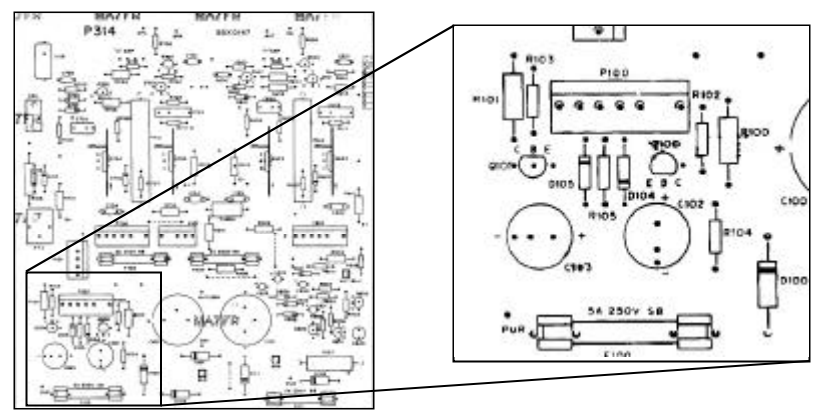
Remove the low voltage components from the highlighted area of the deflection board.
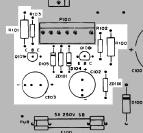
Once removed your deflection board should look like this.
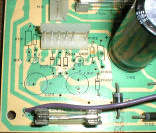
Remove the entire lead of each component from the holes, i.e., don’t just “clip” them out. If there is any metal or residual solder on the top side of the deflection board, it could short out the LV2000 board when it’s installed.
Make sure the 4 rectifier diodes (D100 - D103) are good and that the big filter caps (C100 & C101) are still good Replace any blown fuses.
Prepare the holes in the deflection board by removing the solder from the Q100 emitter, Q101 emitter, lower ZD101, top R100, and top R101 holes. This is where some solder wick comes in handy! Insert the LV2000 into the deflection board. The 3 standoffs that were installed on the LV2000 go into the Q100 emitter, Q101 emitter and the lower ZD101 holes (the holes marked with a circle in the deflection board drawing below). note: on the first generation of deflection boards (as well as in the monitor manual), ZD101 was mislabeled as R105
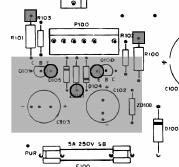
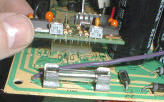
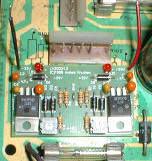
Solder the 3 leads to the deflection board and trim them.
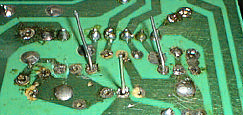
Solder the black wire into the top hole where resistors R101 came out of (the left hole marked with a square in the deflection board drawing above), and solder the red wire into the top hole where resistor R100 came out of (the right hole marked with a square in the deflection board drawing above).
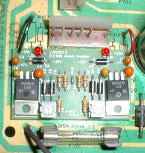
Testing your work!
Plug your deflection board into the monitor harness. This can be done without installing the deflection board in the monitor, which makes testing easier. Lay the deflection board on something that does not conduct electricity, like a piece of wood or plastic cutting board. Do not plug any of the power transistors, or coil, etc. into the deflection board, since we are now going to test that the LV2000 alone is functioning. With only the harness plugged in, the monitor will not be generating high voltage. Note: The resistor in the degaussing circuit may smoke for a second. This will not cause any harm to the degaussing circuit or other parts of the deflection board. If you become disturbed by the sight of a small puff of magic smoke, then you can plug the degaussing coil in at this time. This just makes it harder to get to test points at the LV2000, since the deflection board has to be in the monitor if the degaussing coil is plugged in.
Turn the game on, the 2 leds on your LV2000 should light up
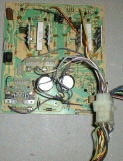
Measure the voltage on connector P100
Hook up the ground of a volt-meter to the ground post on the deflection board, this post is about 1 inch tall, and it’s between the 4 rectifier diodes and labeled GND on the deflection board. It’s also where the single black wire plugs onto when the deflection board is installed in the monitor (you don’t need the black wire hooked up to do this test).
The power transistors have between a .5 and 1 volt drop across them, which will supply the rest of your deflection board with approximately +/- 25V. (note: The manual says it should ideally be +/-25 volts, but the original design of the low voltage section actually produced between 27-28 volts. We have found that +/- 25 volts works just fine.)
Install the board back into your monitor, reconnect all the plugs and fire it back up.
The Power transistors should all be checked before plugging any of them in. A bad transistor shouldn’t cause any damage to the LV2000, but will blow your fuses if the current draw through the transistor is too high. If you have removed any power transistors since the last time your monitor was working, be sure to make sure that the case of the transistor is not shorted to the monitor chassis. (should read as an open on your multimeter) At this point you can fine tune your voltages with everything plugged in and running. You can use the monitor chassis as ground and take measurements from the top of the connector that plugs into P100. This time check pins 4 & 5, which are the output from the low voltage power transistors (this is the voltage that’s actually being delivered to the deflection board and is usually about .5 to 1 volt lower that what the LV2000 is putting out)
Once your game is on and the picture is displaying correctly, you may have to adjust the X and Y size, center, linearity, etc.
to get the picture to be the same size as it was before the LV2000 was installed. This will happen since the voltage produced
by the LV2000 will be slightly different than the voltage that was produced by the old low voltage components.
